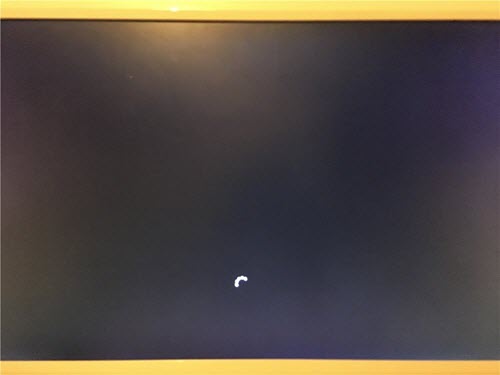
The black screen dot error often occurs during the Windows 10 update process, on the screen only appears a black screen with a rotating dot to start Windows and cannot continue the update. The cause of this problem is usually an error by registration during the initialization of the update, resulting in Windows 10 not being able to complete the update and restart. Taimienphi will guide you to fix it with just a few commands.
Fix black screen dots during Windows update
Step 1: From the rotating dot screen, you hold down the power button of the computer and laptop to restart the computer

Step 2: Wait for Windows to fix the error and boot into the old operating system, click the Start button, type the line “cmd”

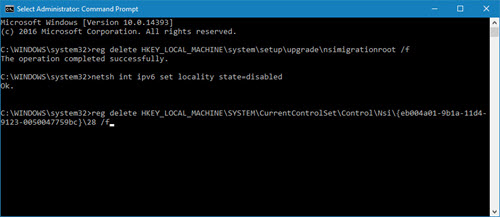
Step 3: Right-click the Command Prompt line that appears in the results table, select Run as Administrator to launch the command program

Step 4: Enter the command lines below in turn, Enter after each command
– reg delete HKEY_LOCAL_MACHINEsystemsetupupgradensimigrationroot /f
– netsh int IPv6 set locality state=disabled
– reg delete HKEY_LOCAL_MACHINESYSTEMCurrentControlSetControlNsi{eb004a01-9b1a-11d4-9123-0050047759bc}28 /f
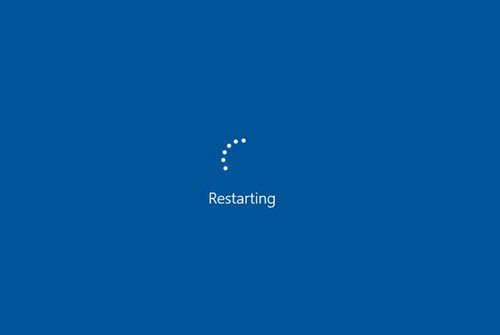
Step 5: Restart the computer, proceed to check and update Windows again, and check for symptoms.
Above is a method to support fixing the black screen dot error during the Windows 10 update process, you can follow to fix it. In case you cannot solve the update problem, you can reset Windows 10 then update again to always ensure the use of the latest operating system.
https://thuthuat.taimienphi.vn/sua-loi-cham-tron-man-hinh-den-trong-qua-trinh-cap-nhat-windows-10-22226n.aspx
In the process of upgrading Windows 10, in addition to the above black screen dot error, the 0x8007042c error sometimes occurs with some computers today, how to fix 0x8007042c error on Windows 10 is also quite simple, because related to the firewall, you only need to adjust a little to be able to fix the error 0x8007042c successfully.